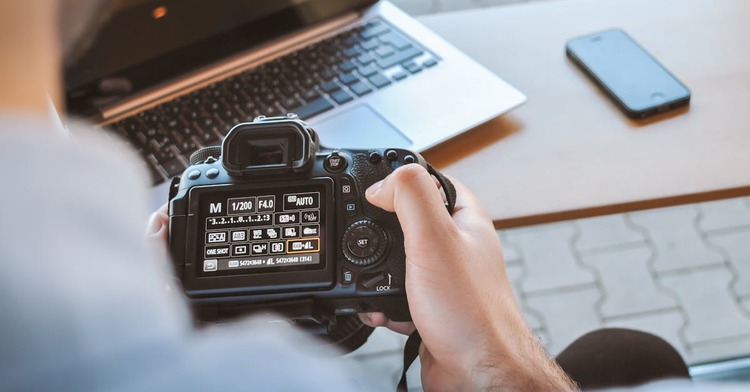
Adventure photography captures the thrill of the outdoors, from majestic landscapes to adrenaline-fueled moments. However, even the most stunning photos can benefit from editing to bring out their full potential. Post-processing allows you to enhance colors, adjust lighting, and refine details, ensuring your images truly capture the magic of your adventures. Whether you’re a beginner or a seasoned photographer, these editing tips will help elevate your outdoor photos to the next level.
Why Edit Your Adventure Photos?
Editing is an essential step in the photography process, transforming good shots into great ones. Here’s why it matters:
- Highlight Natural Beauty: Editing enhances colors, contrast, and textures to better reflect the real-life scene.
- Correct Exposure Issues: Adjust brightness, shadows, and highlights to balance lighting.
- Tell a Story: Editing lets you create a consistent style or mood that conveys the emotion of your adventure.
- Polish for Sharing: High-quality edits make your photos stand out on social media, blogs, or prints.
Essential Tools for Editing
To edit adventure photos effectively, you’ll need the right tools.
Editing Software:
- Adobe Lightroom: Ideal for beginners and pros, it offers powerful tools for color correction and exposure adjustment.
- Adobe Photoshop: Best for advanced editing, including retouching and removing unwanted elements.
- Snapseed: A free, user-friendly app for quick edits on your phone.
- Affinity Photo: A cost-effective alternative to Photoshop for detailed edits.
Calibrated Monitor: Ensure your screen displays accurate colors and brightness for precise editing.
RAW Files: Shoot in RAW format to preserve maximum image data, giving you more flexibility in post-processing.
Key Editing Techniques
1. Adjust Exposure and Contrast
Outdoor photography often involves tricky lighting conditions, from bright sunlight to deep shadows. Adjust the exposure to correct underexposed or overexposed areas.
- Tip: Increase contrast slightly to add depth and drama to your photo. For landscapes, adjust highlights and shadows to bring out details in the sky and foreground.
2. Enhance Colors
Colors play a crucial role in outdoor photography. Editing can make the colors in your images pop while maintaining a natural look.
- Tip: Use the saturation and vibrance sliders sparingly to boost colors without making them look unrealistic. Adjust the white balance to correct color tones (e.g., warming up a sunrise shot).
3. Sharpen and Reduce Noise
Adventure photos often involve movement, low light, or handheld shots that can result in a lack of sharpness or noise.
- Tip: Use sharpening tools to enhance details but avoid overdoing it, which can create a harsh look. Apply noise reduction to smooth out grain, especially in night shots.
4. Crop and Straighten
Composition is key to impactful photos. Cropping and straightening can refine your framing and eliminate distractions.
- Tip: Use the rule of thirds to guide your crop. Straighten horizons for landscapes to maintain balance.
5. Highlight Details with Dodging and Burning
Dodging (lightening) and burning (darkening) allow you to emphasize specific parts of an image.
- Tip: Lighten areas you want to draw attention to, such as a subject’s face, and darken less important areas to create depth.
6. Enhance the Sky
Skies can make or break outdoor photos. Editing can bring out the drama in clouds or intensify the colors of a sunset.
- Tip: Use gradient filters to adjust exposure or color in the sky without affecting the rest of the image. Add a subtle vignette to focus attention on the center of the frame.
7. Remove Unwanted Elements
Distractions like power lines, litter, or stray objects can detract from your photo’s impact.
- Tip: Use the clone or healing tool to remove unwanted elements cleanly. Apps like Photoshop make this process seamless.
8. Create a Signature Style
Developing a consistent editing style sets your photos apart and creates a cohesive portfolio.
- Tip: Experiment with presets or filters to find a look that suits your photography. Subtle adjustments to color tones or contrast can define your aesthetic.
Workflow for Efficient Editing
Editing can be time-consuming, so establishing a workflow will help you stay organized and efficient:
- Organize Your Files: Sort and label your photos by date, location, or project.
- Cull Your Images: Select the best shots by evaluating focus, composition, and overall impact.
- Edit in Stages: Start with global adjustments (e.g., exposure, white balance) and move to local edits (e.g., retouching, sharpening).
- Save and Export: Save your edits in high resolution and export images optimized for web or print use.
Tips for Mobile Editing
If you prefer editing on the go, apps like Snapseed, Lightroom Mobile, and VSCO offer powerful tools for quick adjustments:
- Use Presets: Mobile apps often come with presets to apply professional-looking edits with a single tap.
- Adjust Gradually: Start with small changes to avoid over-editing.
- Sync Across Devices: Cloud-based apps like Lightroom allow you to edit seamlessly between mobile and desktop.
Ethical Editing in Adventure Photography
While editing enhances your photos, staying true to the scene is essential, especially in nature photography. Avoid altering elements to the point where the image no longer reflects reality. This is particularly important for wildlife and conservation photography, where accuracy matters.
Conclusion
Adventure photography editing is about enhancing what you’ve captured while preserving the authenticity of your experience. With the right tools, techniques, and a touch of creativity, your outdoor photos can go from ordinary to extraordinary. Whether you’re sharing on social media or creating a personal portfolio, post-processing allows your images to tell a story that inspires others to explore the great outdoors.
Ready to refine your editing skills? Visit www.outdooradventures.pro for more tips, tutorials, and gear recommendations to elevate your photography game.

.png)

-(2).png)


.png)

.png)
-(1140-×-106-px).png)
.jpg)
Leave Comment Below